Mia is an app that runs on Microsoft Teams, serving routine yet vital HR tasks. It allows you to complete a number of regular HR tasks such as check In/Out, maintaining timesheets, applying for leave, various requests to HR and more.
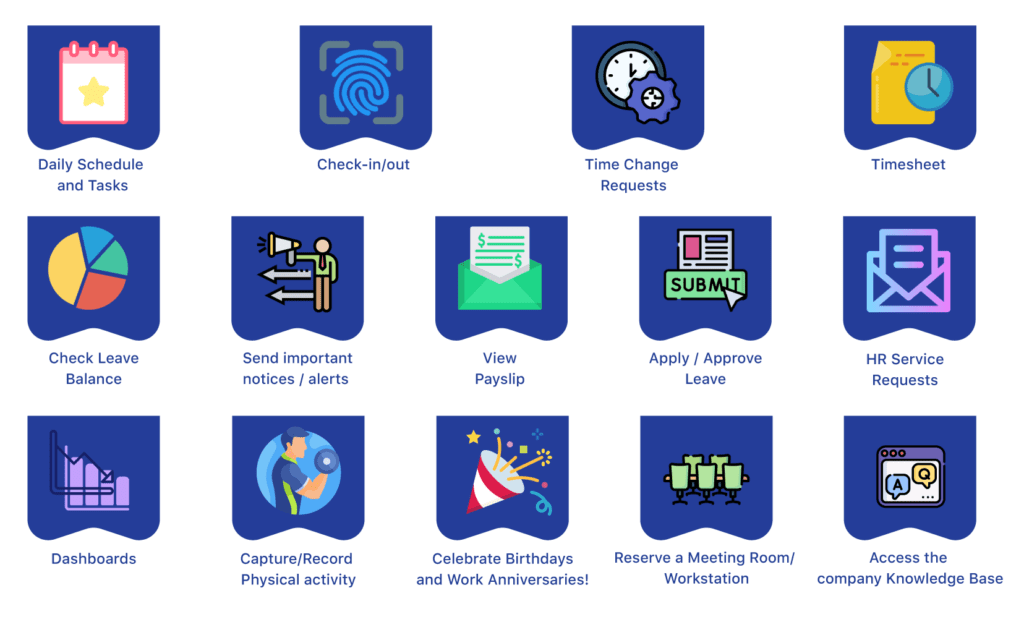
The key capabilities of Mia are as follows:
Guidelines for Administrative Users
1. Setting-up your Mia
1.1 Steps in setup wizard
(If you are currently using the MiHCM core HR product, please proceed directly to section 1.2.)
Before using the Mia app you are required to conduct some configurations. Once you have signed up for Mia, you will receive a URL which allows you to run the setup wizard, making these configurations simple and easy.
Screens in the setup wizard are as follows:
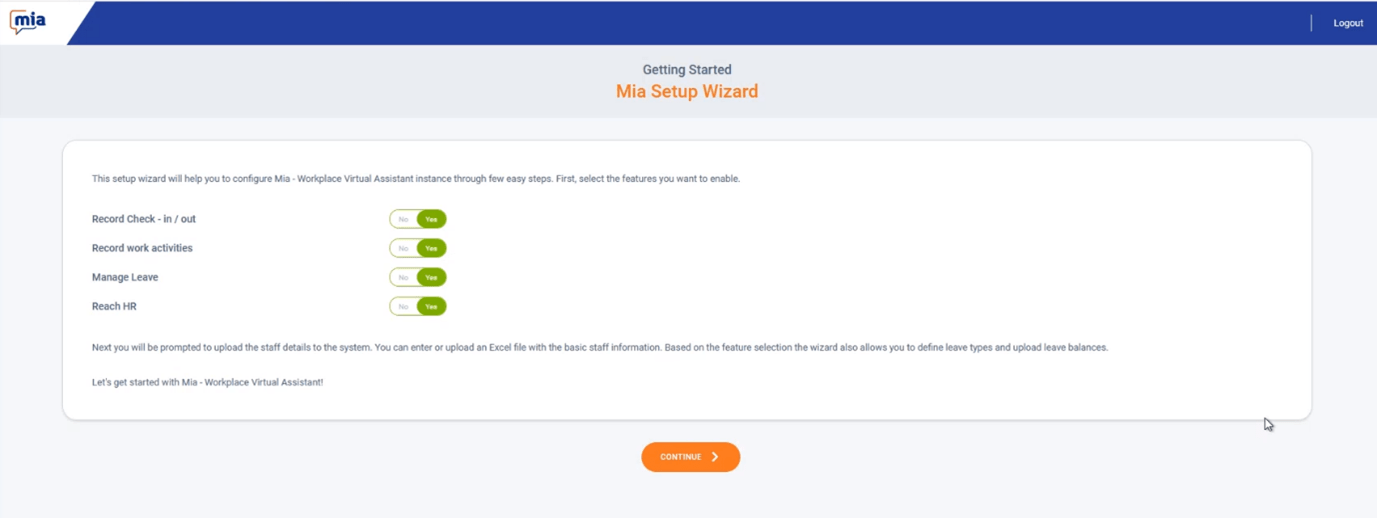
1. Welcome page
This shows a welcome message and a brief description and some functionalities in Mia. You can enable the necessary features here.
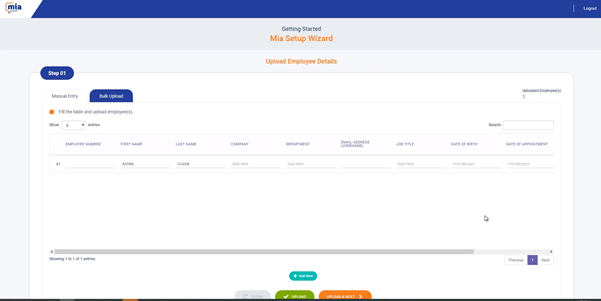
2. Upload employee details
In this step, employee details can be entered individually to the grid or uploaded in bulk format within an excel sheet. Organization relationships (e.g., which departments will fall under which Company) will also be established as a part of uploading employee details. The Excel sheet template used for uploading employee details can be downloaded by pressing the <Download Template> button.
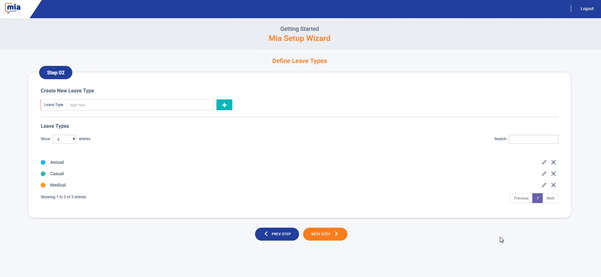
3. Create leave types
In this step, you can define the leave types which will be used by employees when applying for leave. E.g., Annual leave, casual leave etc.
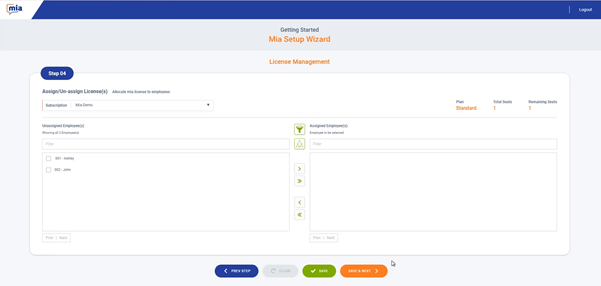
4. License Management
You can define and allocate licenses to the uploaded employees using this step. The licenses allow the usage of Mia for the allocated employees.
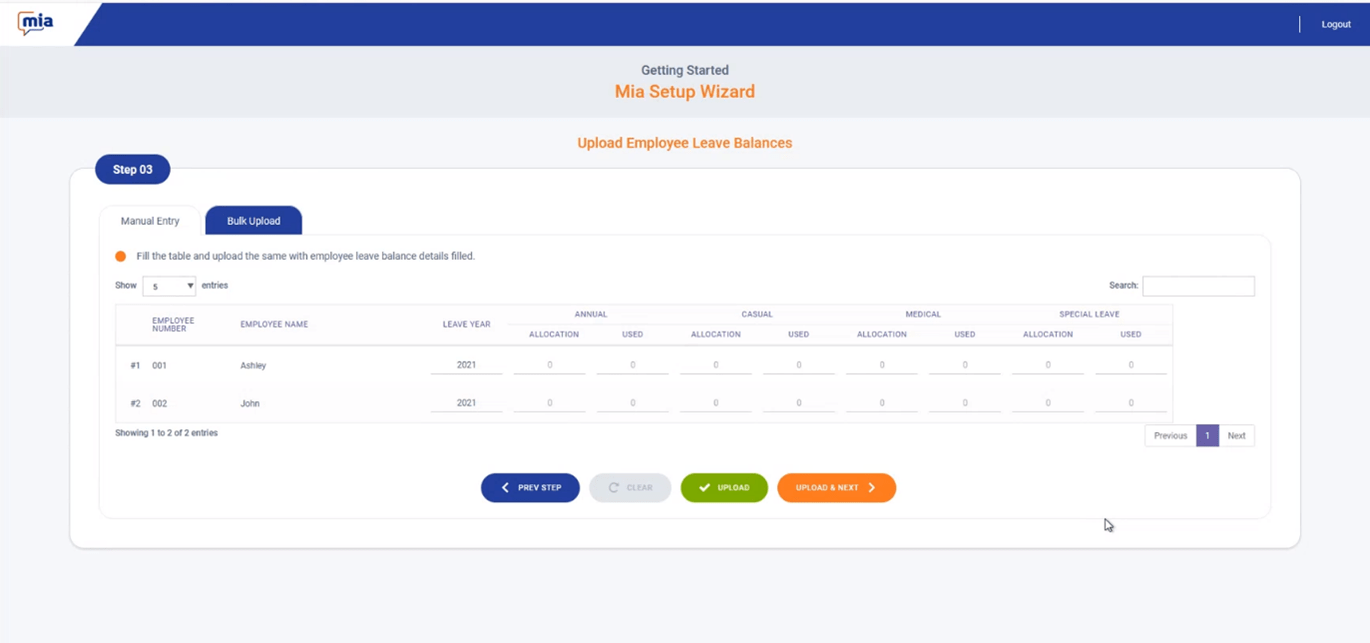
5. Leave Balances
Uploading employee leave balances takes place in this step. User is required to enter leave balances in the grid or the Excel sheet for bulk upload
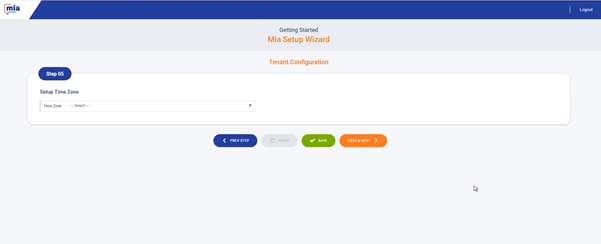
6. Time Zone
The time zone can be set up using the following screen.
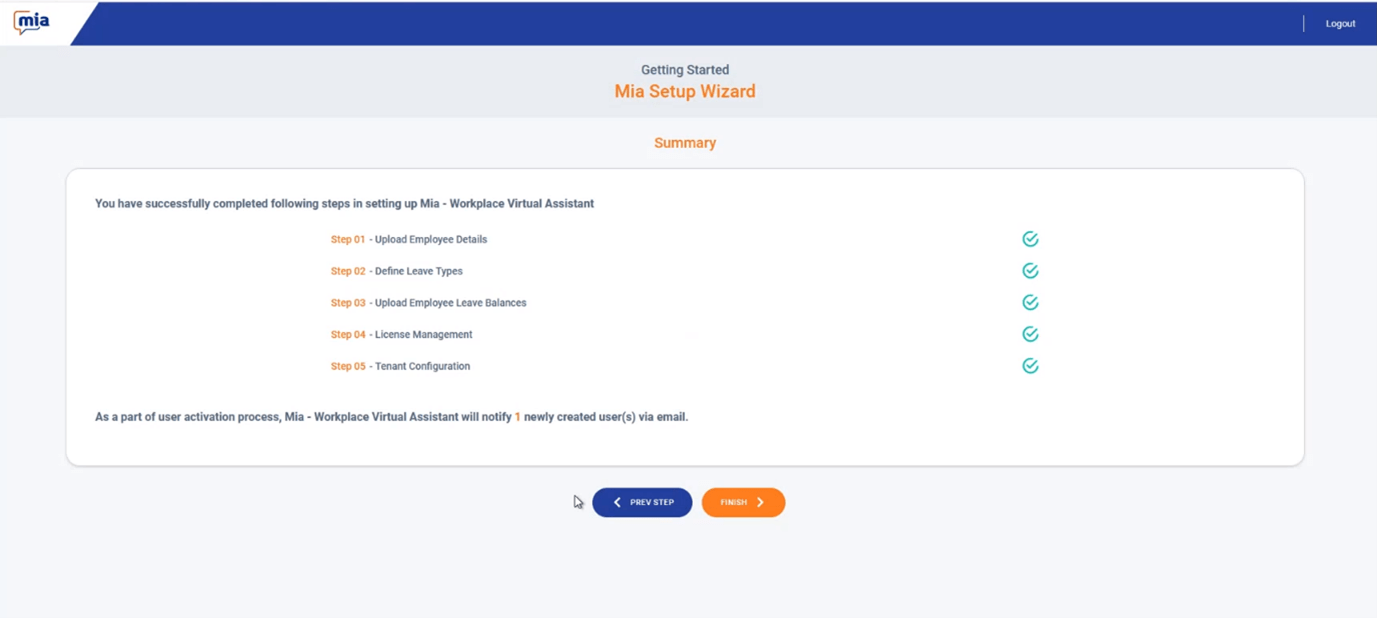
7. Summary
The following screen marks the summary of the entire setup wizard.
1.2 Setting Up Outlook Calendar Sync-Up Administrative Permissions
Once you log into your personal portal using the assigned administrative credentials, the next step would be to enable the outlook time zone check in/out and to give in administrative privileges for Mia to access your personal outlook calendars.
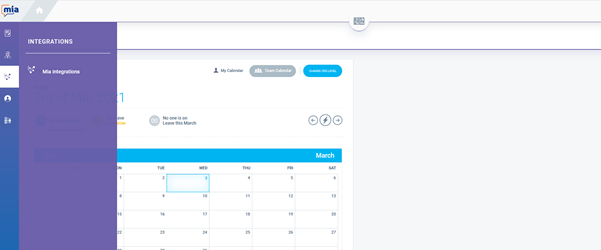
Navigate to the Mia integrations as shown below,
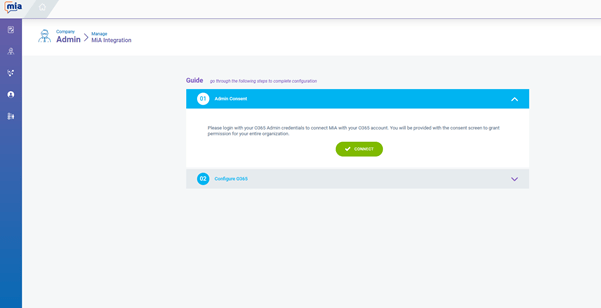
The next step is to ensure to give consent by the global outlook administrator of your organisation to affiliate the sync up of calendars. In order to do this, select “Connect” and login using the Office 365 administrator credentials.
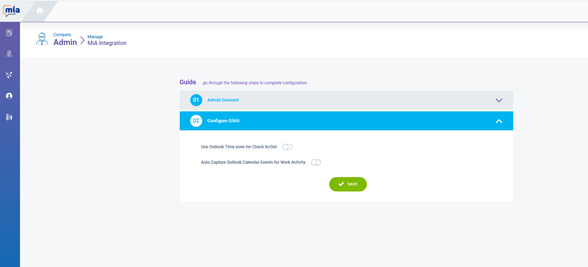
Finally, toggle both options opting in for “Check In/Out” and “Auto Capture Outlook Calendar Events for Work Activity” (To be captured in the Time Sheet), and click “Save”.
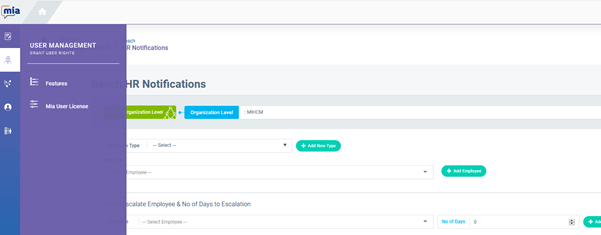
1.3 Setting Up Reach HR Notifications
Reach HR notifications are required to be setup to ensure that all HR requests go to the respective people when submitted.
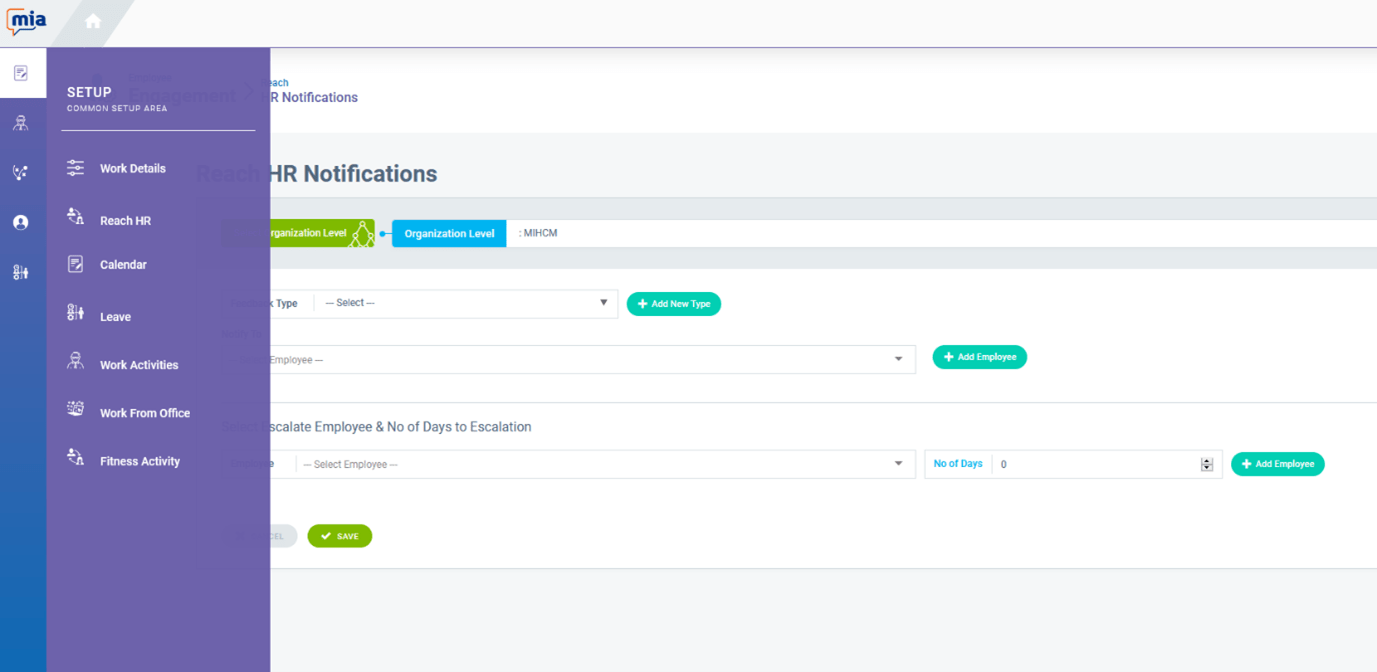
Navigate to the Reach HR page,
Select the organisation structure to apply to a certain organisation level. You may then select a feedback type from the drop-down list, specify a notifying employee to give ownership of the request type to him/her, and then click on “+Add Employee” to finalize the selection. Escalation employees and the number of days of escalation can also be specified. In order to save the configuration, click “Save” at the bottom of the screen.
1.4 User Management
Using this area, the Admin User can configure licensing and Mia feature rights.
Features
Using the feature rights menu, you can activate/deactivate Mia functionalities for a given user role. As such, it is important to note that employees within a given user role will only have access to the functionalities enabled for that particular user role.
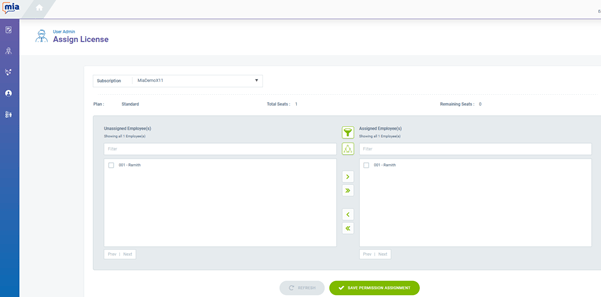
Mia User License
Mia Licenses can be given to the necessary individuals using this page. Licenses may be assigned by simply selecting the required employees, sending them to the assigned employees list and clicking “Save Permission Assignment” upon completion.
2.Mia Functionalities which require administrative configuration
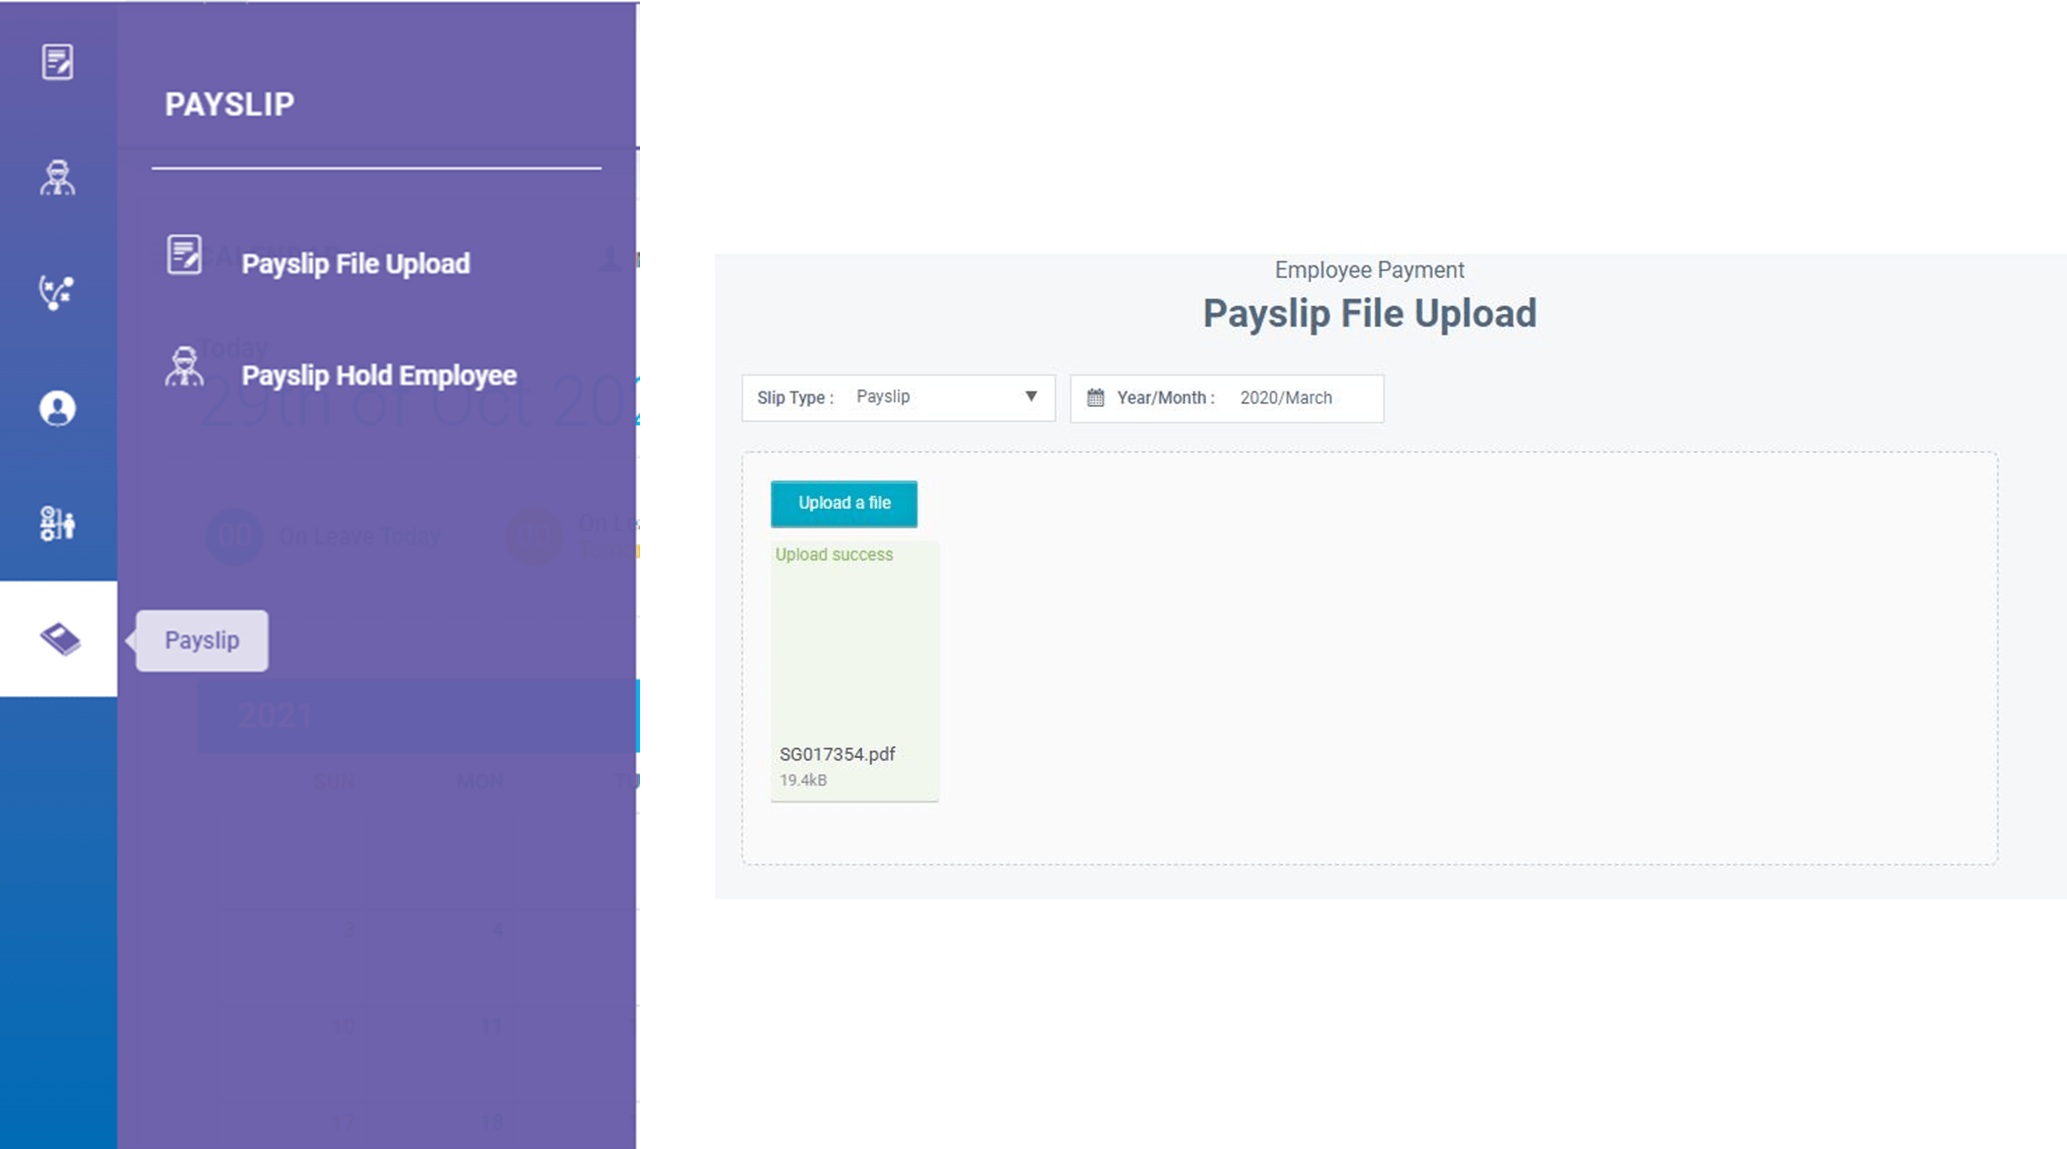
2.1 Upload Pay slips to Mia
One of the capabilities of Mia is to allow employees to view their pay slips via the Microsoft Teams app. In order to enable this experience, you are required to upload employee pay slips using the web-based backend application of Mia, if you have subscribed for it. To upload your payslips, follow the path Payroll > Payslip File Upload from your main MiHCM Menu, as shown in (A) below.
(A)
Once you are redirected to interface (B) above, select the Slip type as ‘Payslip’ and select the year and month. Pay slips of multiple employees may be uploaded in one go, and they should be named with the employee number of the respective employee.
To view the corresponding End User Experience, go to ‘View payslips using Mia’. (End User- 2.10)
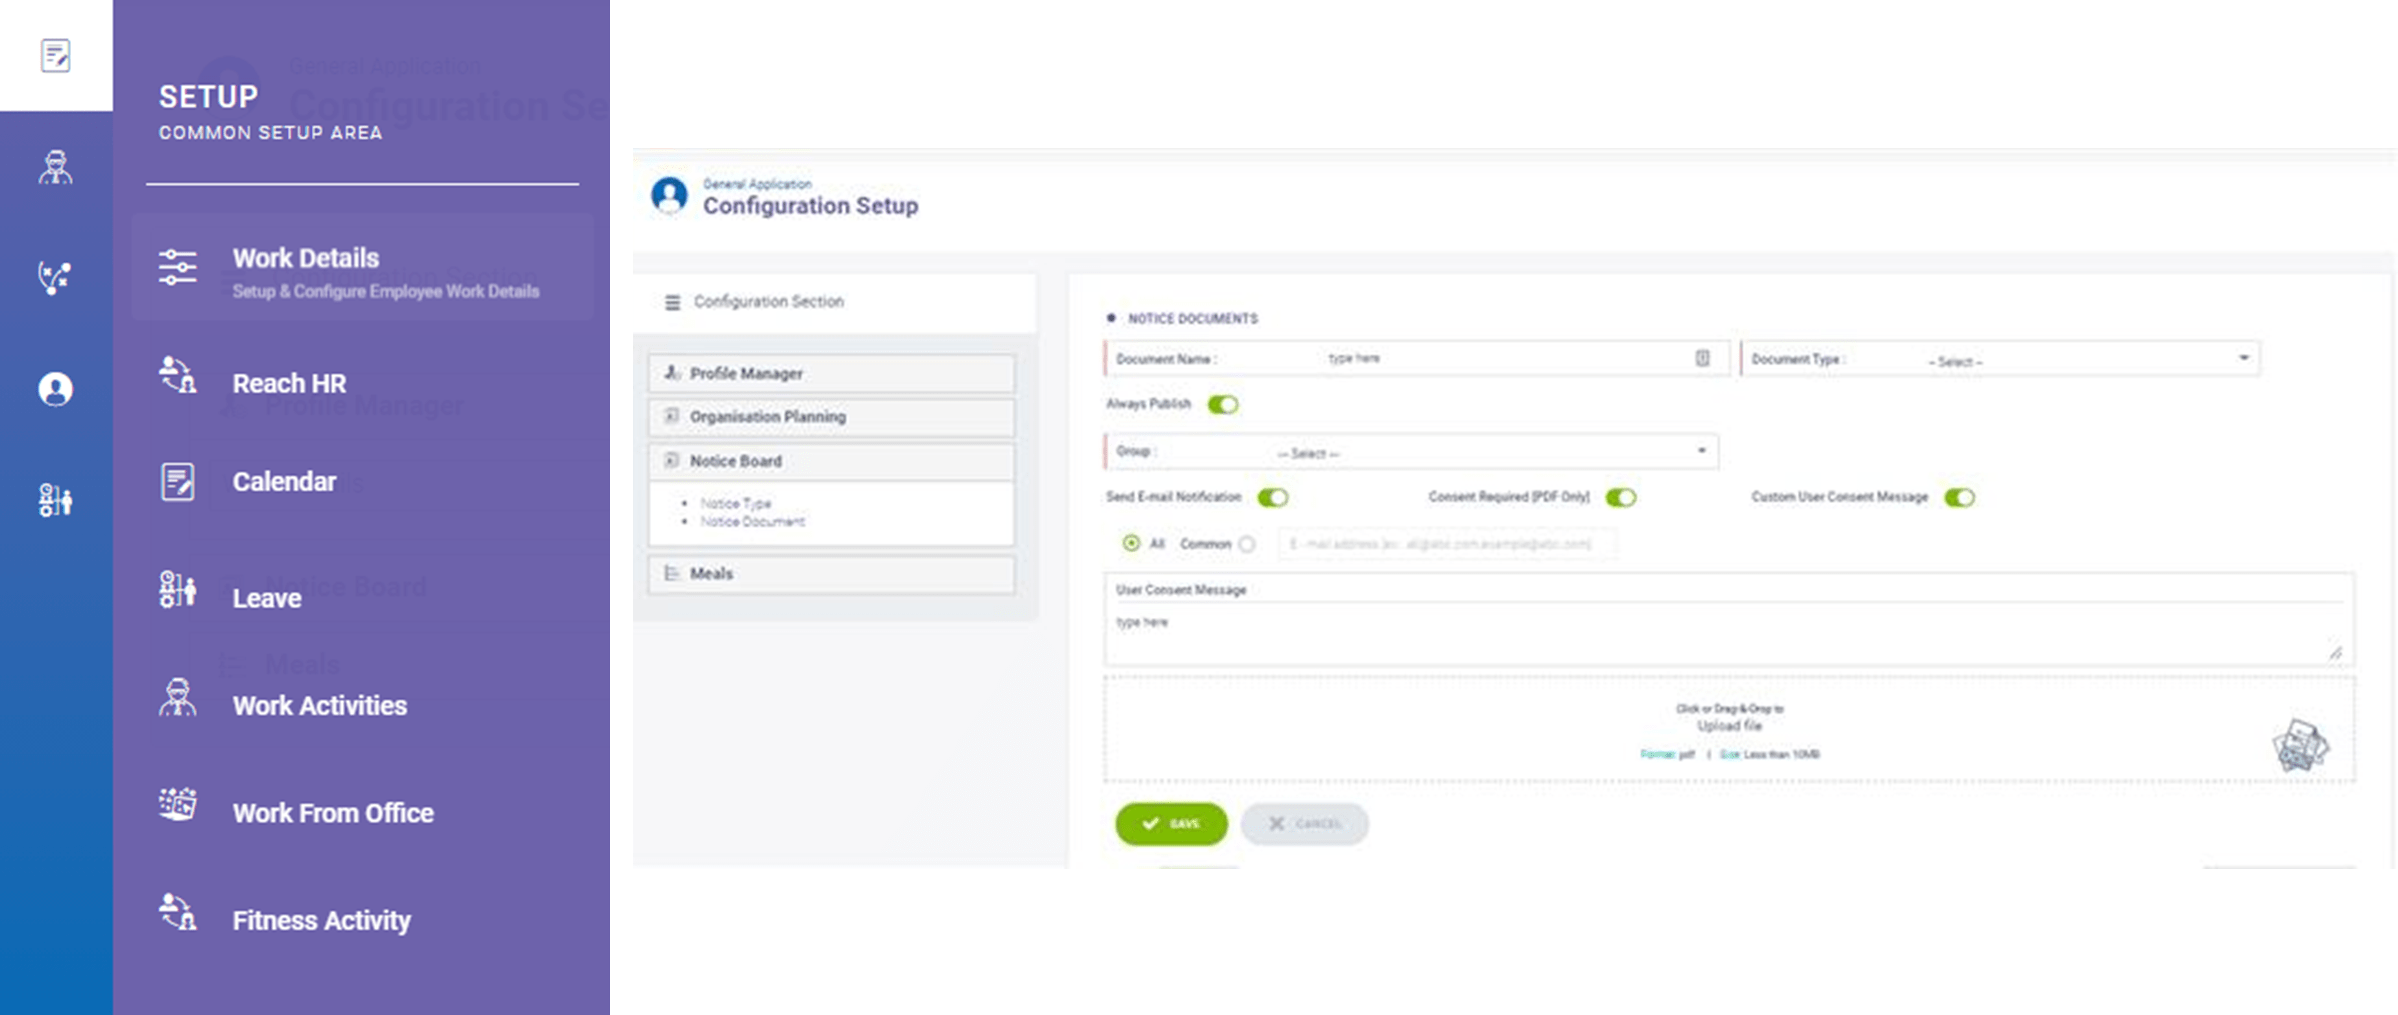
2.2 Compose and disseminate a notice through Mia
Follow the path Setup (Common Setup Area)> Work Details from your main MiHCM Menu (A) to set up this experience: Once you have selected the above menu option, you will be redirected to the following ‘Configuration Setup’ interface (B). Select Notice Board > Notice Document to proceed.
Once you are directed to interface (B) above, follow the steps below to compose and disseminate a notice through Mia.
Select a ‘Document Name’ and ‘Document Type’ for identification purposes.
Select ‘Always Publish’ or enter a date until which you wish your notice to be published.
Select the ‘Group’ your notice is required to be sent to.
Select ‘Send E-Mail Notification’ to inform the recipients about the notice by E-Mail as well.
Select ‘Consent Required’ if you wish to gain the receivers consent before sending the notice. (Please note that for security reasons, this feature is only available for notices on the form of a PDF.)
Click and upload / Drag and Drop any documents you wish to attach to the notice using the ‘Upload File’ section.
Click ‘Save’ to save and disseminate your notice through Mia.
This feature enables you to specify your office locations, facilities and capacity, so that your employees may reserve themselves an office space when necessary. When an employee submits a request to reserve a seat for a particular day, the request may be approved or denied as necessary by the relevant superior (In line with the approval workflow already defined), through his/her own Mia interface.
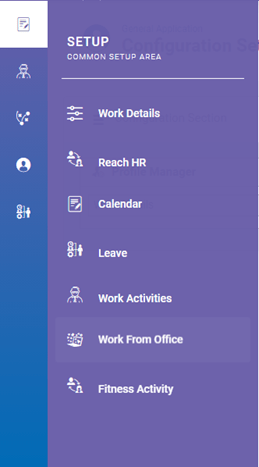
Follow the path Setup (Common Setup Area) > Work From Office from your main MiHCM Menu to set up this experience
Once you have selected ‘Work From Office’ as indicated above, you will be directed to the following interface within which you may specify your office 1. Location(s), 2. Floor(s) and 3. Area(s).
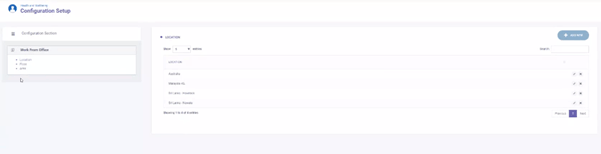
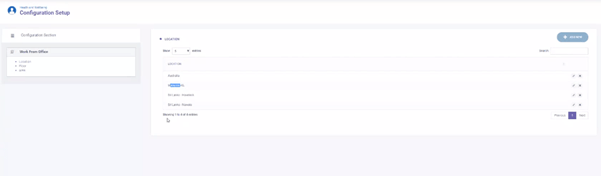
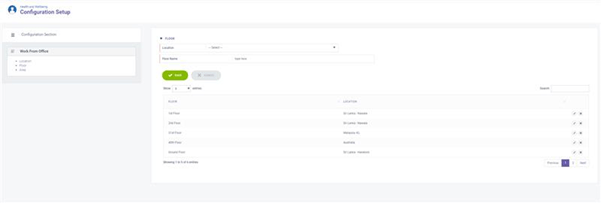
1. Location(s) By completing this step, you may define the office locations available for use by your employees.
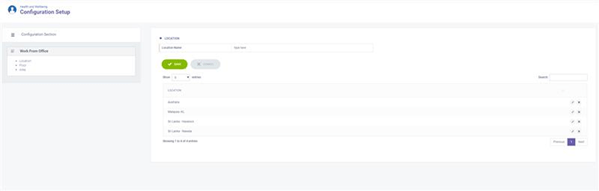
1. If you wish to edit an existing Location, select the corresponding pencil icon, and edit and save your changes. 2. If you wish to add a new office location, select the ‘Add New’ button to continue. 3. Once you are redirected to the interface above, enter your new office location and click ‘Save’.
2. Floor(s) In this step you are required to define the floors available at each of the locations you defined in Step 1 above.
1. Once you have completed Step 1 above, select ‘Floor’ from the menu on the left side of your interface to continue.
2. Once you are directed to the interface above, select the corresponding pencil icon to edit an already defined floor. 3. To add a new floor to one of your locations, select ‘Add New’.
4. Once you are directed to the interface above, you may proceed to define your new floor within the corresponding location. Select ‘Save’ to save your changes.
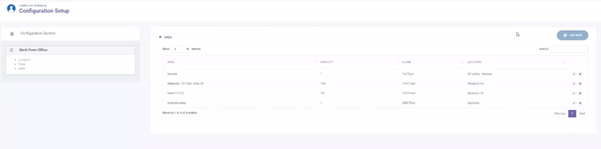
3. Area(s) In Step 3 you are required to define the specific type of ‘Area’ available, and the ‘Capacity’ it can accommodate for each floor you defined in Step 2 above.
1. Upon completing Step 2 above, select ‘Area’ from the menu on the left side of your interface to continue.
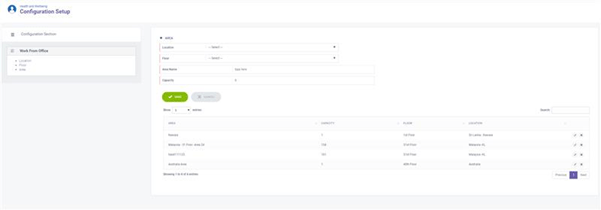
2. Once you are directed to the above interface, you may select the corresponding pencil icon if you wish to edit an already defined ‘Area’. 3. To add a new ‘Area’ select the ‘Add New’ option.
4. You may then proceed to select the relevant ‘Location’ and ‘Floor’ from those previously defined by following Steps 1 and 2. Once you have selected the above, you may proceed to name the new ’Area’ and define the capacity that it is able to accommodate within the interface above. Once you have finished, select ‘Save’ to implement your changes.
Upon completing the above steps, your employees would then be able to request to work from office through Mia. When an employee types in a request to work from office, Mia will check the availability of seats in the particular ‘Area’ on the specified date, and will only accept the request and send it for approval through the workflow if there is an available seat.
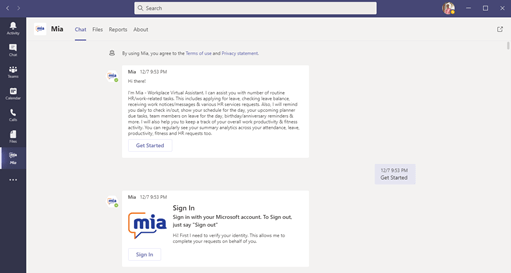
When you use Mia for the first time, you will be prompted to sign-in. Upon pressing the ‘Sign In’ button and entering your E-Mail Address, you may follow 1 or 2 below as required.
If you are anexisting user of the MiHCM Core product, you may either sign in by using your MiHCM credentials, or with your credentials for your identity provider of choice (Microsoft, Google or Apple).
If you are not an existing user of the MiHCM Core product, you will be redirected to the Microsoft portal and may login with your Microsoft credentials.
For further assistance, please contact your systems administrator.
2.Mia Functionalities
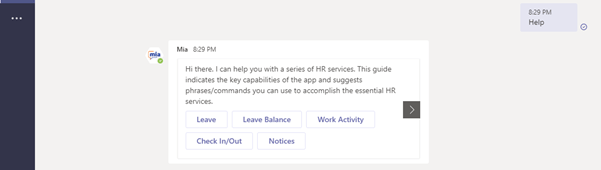
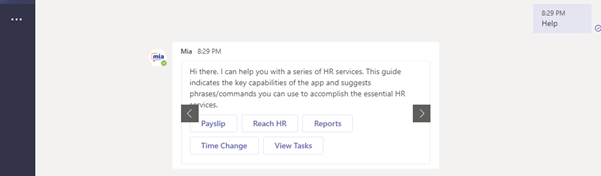
2.1 ‘Help’ command
This guide indicates the key capabilities of the app and suggests phrases/commands you can use to accomplish the essential HR services. You can get the list of all functionalities available in Mia by simply typing the ‘Help’ command.
To get the full functions available please scroll to the right.
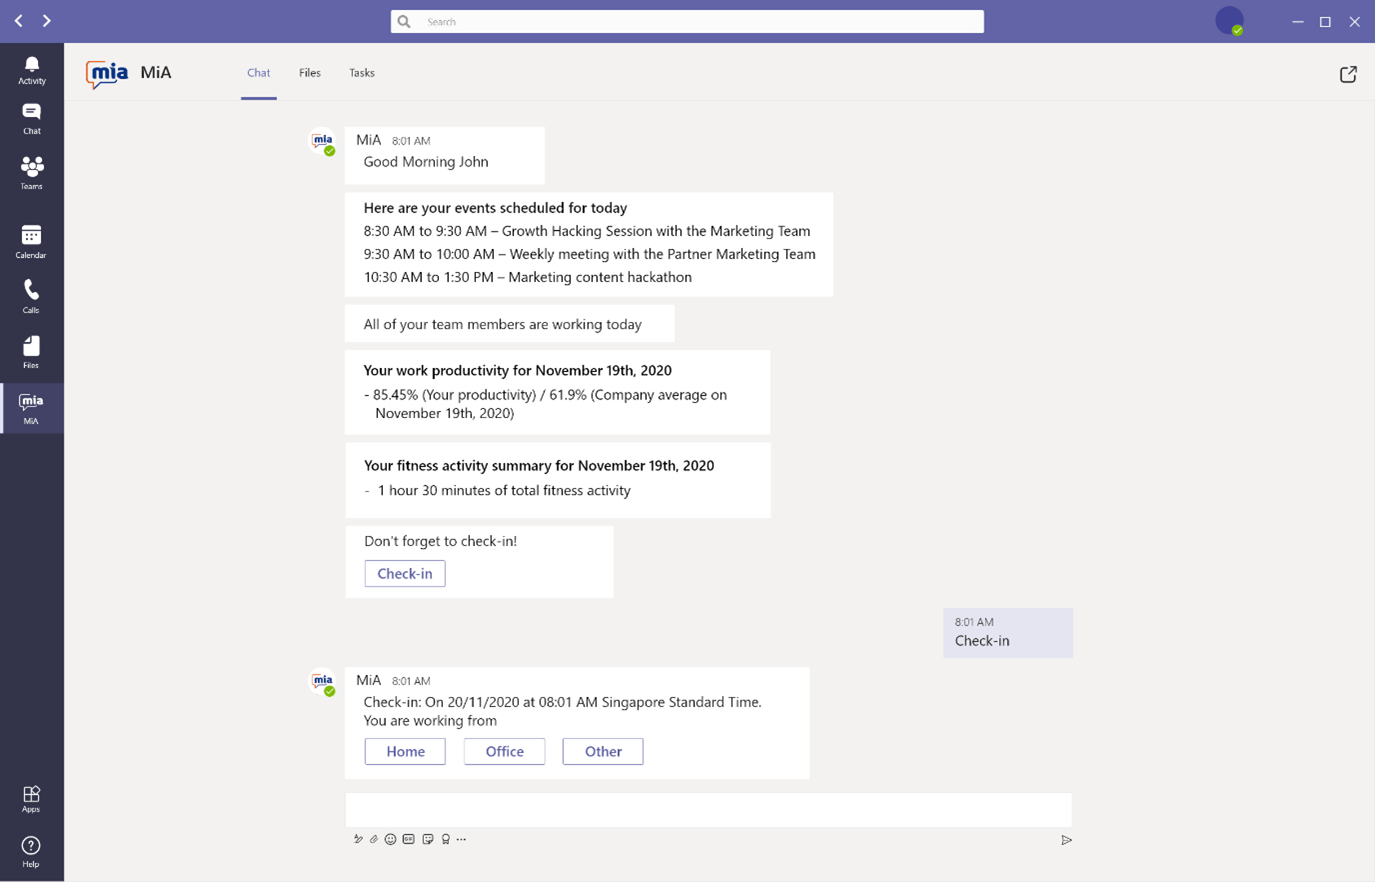
2.2 Morning and evening greetings
Mia sends the morning greeting at the time which has been set to start the shift for the employee in the system, and enables the employee to check-in at the same time.
Mia then lines up your events scheduled for the day and informs you if members of your team are on leave for the day.
In the evening, Mia sends a reminder to check-out with an evening greeting at the time which has been set to end the shift in the system. A reminder to submit your timesheet is also tagged with this greeting.
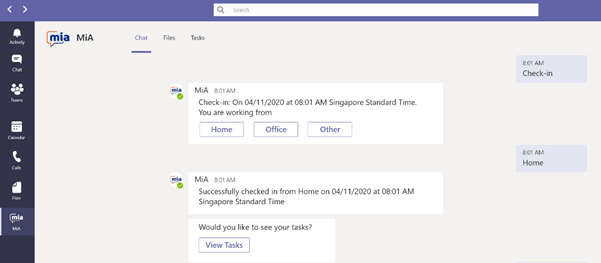
2.3. Check-in/out using Mia
These commands may be used if you wish to to check in/out at a time different to the times at which the greetings mentioned above are sent.
In the command line of Mia, please type ‘Check In’ and submit your request. Mia will ask if you are working from Home, Office or from another location. If you select ‘Other’ as your check in location, you will be prompted to type-in your location.
Once you confirm your check in location, Mia will display the check in date and time along with the check in location, finalising them.
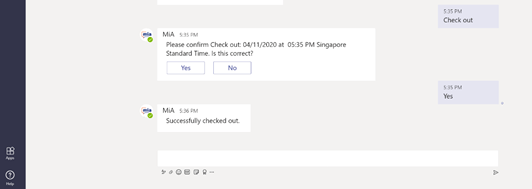
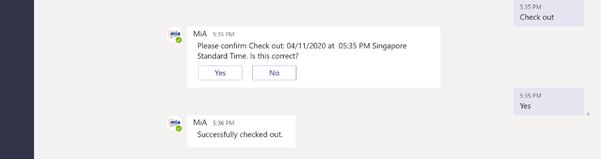
To Check- out, Type ‘Check Out’ in the command line. Mia will display your check out time and request your confirmation. When you press the ‘Yes’ button, it will update your check out time.
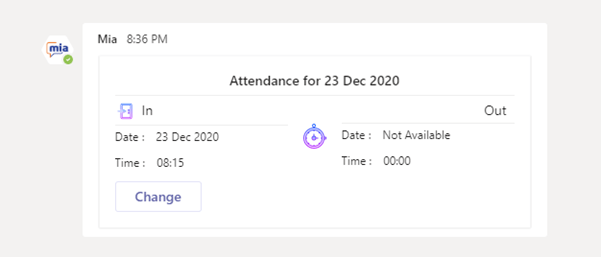
2.4 Time change requests
On certain occasions, you may need to change the check in and check out times already submitted. In order to do so, please type ‘Time change’ in the Mia Teams Chat. You will see the screen given below:
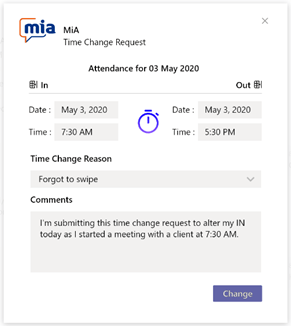
Press ‘Change’ button to select the new times you need to appear as In and Out times. Upon pressing the button, you will see the screen given below:
Select the new In and out times, reasons for changing the time (select from predefined reason type), write a comment and press ‘Change’ button. (The date fields are given to handle situations in which In and Out times falls in two different dates.)
Your request will then be sent for approval to the relevant superior as defined by the approval workflow.
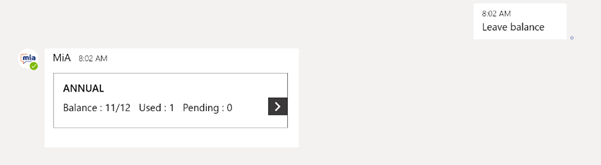
2.5 Checking leave balance using Mia
You can simply type ‘Leave balance’ or ‘What is my leave balance’ to check your leave balance. Navigate right to see your leave balances under different leave types.
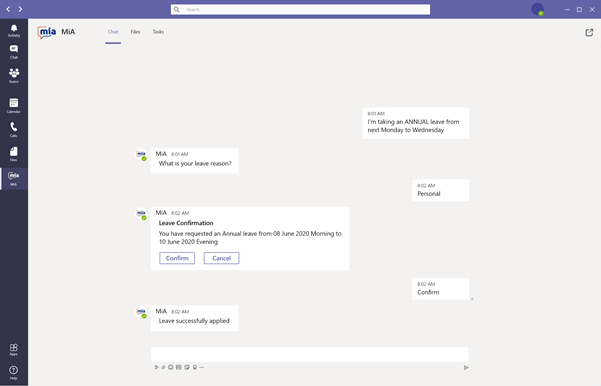
2.6 Apply leave using Mia
If you type ‘Apply Leave’, Mia will request for the starting date of the leave, ending date of the leave, leave type and reason for taking a leave. You can also type a combined command such as ‘Apply casual leave for 05/05/2020’. The system will then ask for the reason for taking leave. After providing the required information, Mia will prompt you to confirm the leave request. Upon confirming the leave details, Mia will submit your leave request for approval.
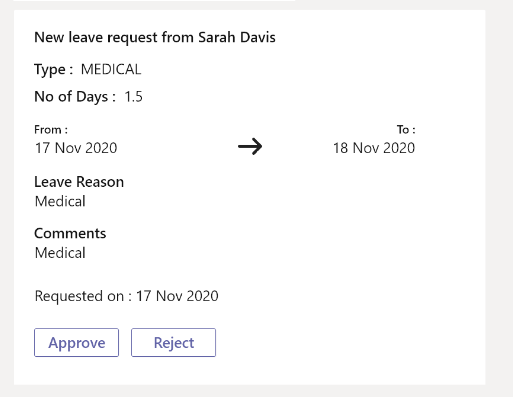
2.7 Leave approval notification
When an employee requests for leave, the leave approval notification will be sent to the approver/approvers assigned in the workflow for that particular employee.
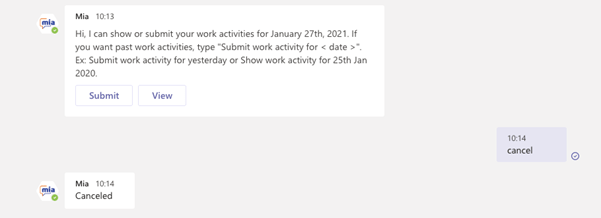
2.8 Cancel an ongoing dialogue
If you wish to abandon an ongoing conversation with Mia, please use the ‘Cancel’ command. For example, if you wish to cancel a request for leave before it is submitted, type ‘Cancel’ and press enter to end the leave request.
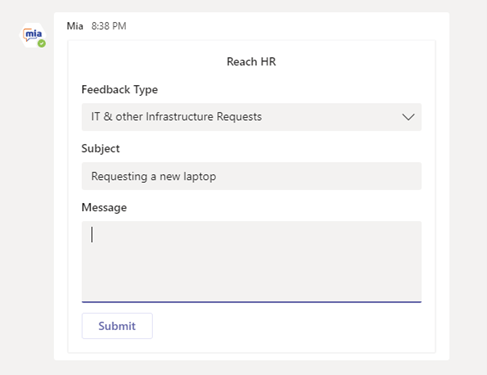
2.9 Requesting HR Services using Mia
Mia allows you to make various requests from your HR team. These requests are categorized depending on the way system administrators have setup HR request categories. Some of the typical requests would be, asking for letters, convey grievances and complaints, new ideas and suggestions, logistics related requests etc. To submit your HR service requests to the HR team, type ‘Reach HR’ and Mia will respond by displaying the list of HR request types. Type the number relevant to your request type and provide additional information when prompted. Mia will direct your request to the HR team once these steps are done.
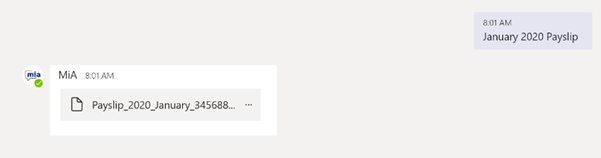
2.10 View payslips using Mia
To view your payslip, type Payslip (E.g. Payslip March 2020)
Mia will respond by sending the PDF version of your payslip.
(N.B. In order for this experience to function, the system admin needs to upload PDF versions of the payslips from the web application).
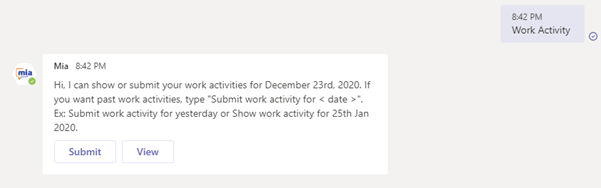
2.11 Update timesheet using Mia
If you wish to submit your timesheet at a time different to that of the evening greeting mentioned above, you can simply type ‘Timesheet’ or ‘Work Activity’. Mia will then display two options, namely ‘Submit’ and ‘View’.
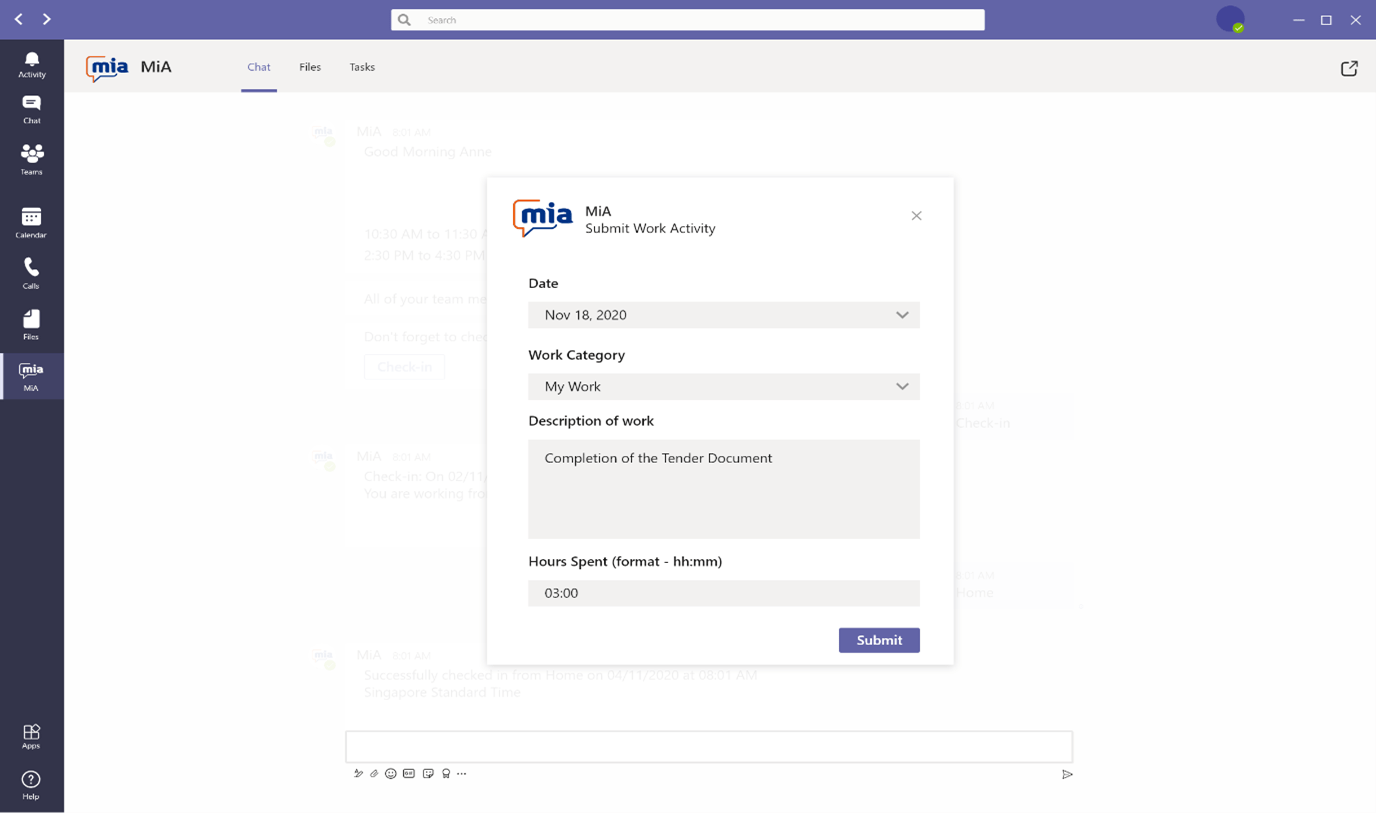
If you select the ‘Submit’ option, Mia will prompt you to select the date, work category, description of the work/task and the time you have spent on it as shown below:
After you have completed the above form, you may submit it by clicking ‘Submit’. Following this, you may click the ‘Submit Another’ button on the screen you are re-directed to, and submit multiple timesheet records.
Please note that Mia has built in routines to capture your work via calendar events. It captures the purpose of the meeting via titles of the calendar events along with the duration of the event and automatically pushes this data into your timesheets. The rest of the activities which are not reflected in the calendar can be entered using the method described above.
2.12 View Timesheets using Mia
Type ‘Timesheet’ or ‘Work Activity’ in the Mia dialogue box and you will be getting two options as ‘Submit’ and ‘View’.
By selecting ‘View’ option, you can view already recorded timesheet entries for the current date. Alternatively, you can type a command like ‘View timesheet 30 Apr 2020’ in order to see the timesheet for a particular date.
2.13 View Notice Board using Mia
You may view notices which your company HR Administrator has shared with you within this experience.
Type ‘View Notices’ into your Mia Chat.
Select the notice you wish to view by typing in the corresponding number from your notice list.
If prompted, select ‘Allow’ to accept and access the selected notice.
2.14 Reserve an Office Space using Mia
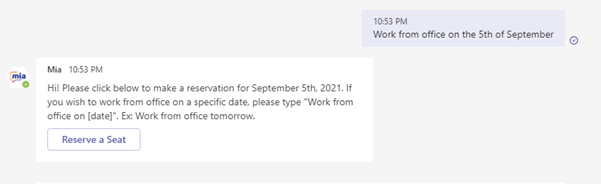
If you wish to work from office on a particular day, or hold a meeting in a particular room, you may submit a request to Reserve an Office Space for yourself through Mia. Upon submission, your request will be sent to the relevant superior (In line with the approval workflow already defined), and you will be notified by Mia of whether your request has been approved or denied.
To reserve an office space, simply type ‘Work from office on’ followed by the relevant date into your Mia chat, and then confirm your request by clicking ‘Reserve a seat’ when prompted.
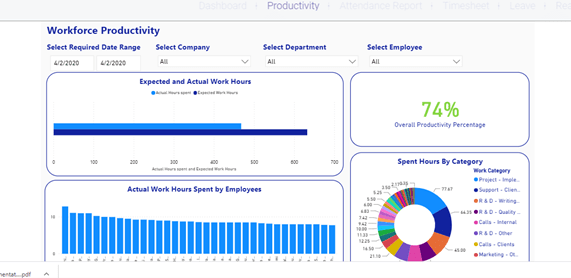
2.15 View Dashboards using Mia
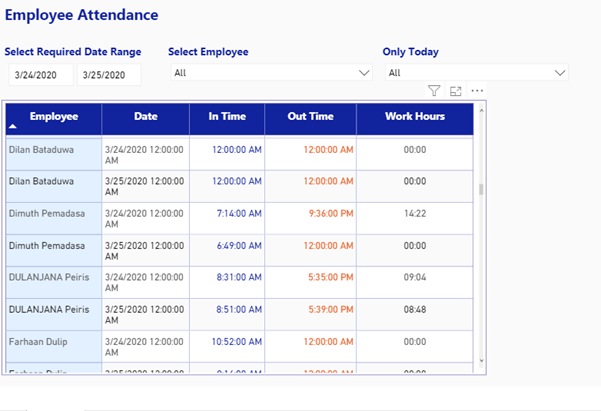
You may view the dashboards which sumarize analytics related to employee attendance, leave, timesheets, productivity and reach HR using Mia. Some analytics and reports are given below:
Reports on employee attendance
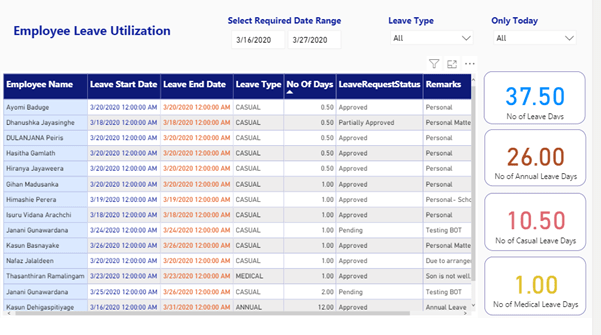
Employee leave utilization
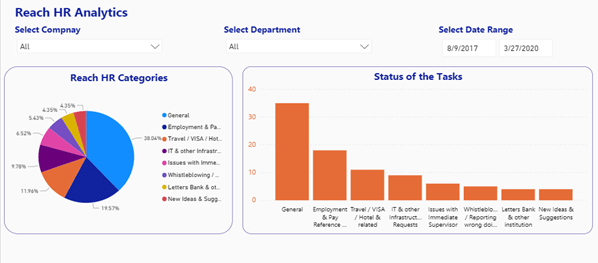
Statistics on Reach HR
Please note that depending on your permission levels, you may see information pertaining to yourself, your team or the entire organization in these reports and analytics. Some analytics have drilling down capabilities which you can access by pressing the right mouse key.
Productivity reports
Mia productivity reports provide an indication on the level of your workforce’s productivity. This is in terms of cumulative timesheet entries employees have submitted on job activities for a given date compared to the number of hours they are expected to work. Productivity figures can be zoomed up and down from the individual employee level to the Company level for a given date or a date range.
2.16 Integration with Outlook Calendar and Microsoft Planner
Through our integration with Outlook Calendar and Microsoft Planner, after you log in to Mia with your Microsoft Credentials, you will automatically be reminded of your scheduled Events and Tasks.
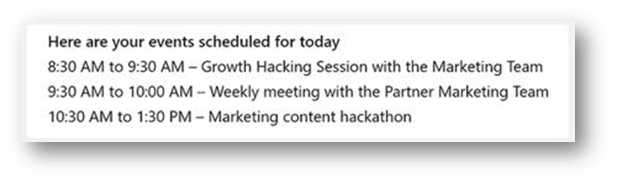
Outlook Calendar
You will be reminded of the events scheduled in your Outlook calendar for the day, along with the morning greeting message sent by Mia at the predefined check-in time of your organization.
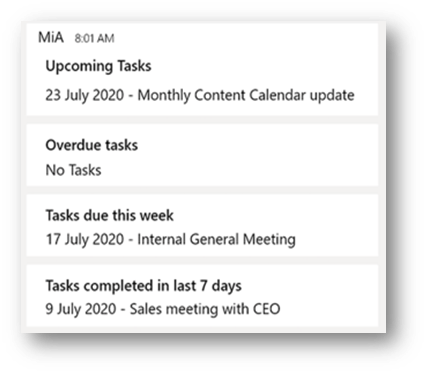
Microsoft Planner
You will be reminded of your ‘Upcoming’, ‘Overdue’, ‘Completed’ tasks and ‘Tasks due within the week’, each day by Mia. Additionally, you may view your tasks at any time by simply typing ‘View Tasks’ into your Mia chat.